Saturday, March 7, 2015

My First Experience at a Scrapbook Event (Crop)

Hello there Scrappers! I know some of you have heard of these "crops" or "retreats" but to those that are not familiar with those it is where ladies get together and scrapbook all day even several days. I had never heard of these until my friend at work told me about them and I was not too sure about how I would like attending one.  I went to my first one in Michigan on February 21, it was from 9 am to midnight! What was so great about this was it was a fundraising event. Scrapbook for a cause sounds good to me! 

I had never packed for a crop before so I did a few preplanned pages which ladies said that would help but still ended up packing up my entire scrapbook room anyways. Here is a picture of what I packed.
One of those totes is just adhesive! I am going to try and post the video that I did showing how I packed and what I packed. An important thing to remember when going to one of these is to not forget your pictures! My friend got there and started to unpack and well she forgot her pictures! Her pictures! But thankfully she lived close by and went back home to get them. This happens more than you think it would. Just think there are ladies that travel long distances to these crops or retreats so going back home would not be an option.

When I first arrived I was greeted by a young boy pulling a wagon asking if I needed help unloading my car. There were also a few young boys and men there to help us ladies unload our vehicles which I thought was amazing! I told the young boy that I had a lot, he said "that's okay my mom brought a lot too!". Once inside the building I got to my assigned table and started to unpack setting everything up.

During the day they did drawings, silent auctions and even had vendors there for us to shop at. They served us lunch and dinner with snacks in between. They had music playing in the background and you could even bring your MP3 players in if you wanted to listen to your own music. Several ladies had laptops at their stations for their cutting machines. My friend and I would walk around looking at other layouts ladies were working on and how they placed everything on their pages to possibly help give us some new ideas for our own pages. A few of the vendors there were selling scrapbook supplies and they would do demonstrations, one even let ladies go up and use the Sizzix dies she brought.

I am so glad I went! It was so nice to be in a room full of other ladies that had the same passion as me. Ladies there were so nice and welcoming I even made a few new friends. I hope to return in October when they host another event! Here are a few pictures from the event to show those that have not gone to one. To those that have been to crops or retreats please comment giving tips to anyone that has not yet been to a crop or retreat. Thanks and have a splendid crafty time Scrappers!


My Scrapbook Find of the Night!

Hello Scrappers! Wanted to let you know to always check the scrapbook sections in ANY stores. I went to Walmart last night doing some grocery shopping after work and decided that since the hubby wasn't with me I could take my time in the crafting sections. So as I'm checking out the scrapbook section I see the Cricut Explore with a red tag under it, it read $150! I freaked! This machine is normally $250 or more! I called the hubby right away and he said get it, it was a good deal! I'm lucky to have a hubby like him. So I grabbed it and ran to the register! I can not wait to check it out and experiment with it. I have not worked with Design Space before so this will all be new and I will be sure to tell you all about it! Have a splendid crafty time and be on the look out for deals everywhere! Craft stores are not the only place we can get into "trouble"!

Wednesday, March 4, 2015

A Few Embossing Techniques


Hello fellow scrappers! Hope you are having a wonderful crafty day! These pages I am about to show you have few techniques I have picked up and I would like to share them with you.  Hope these ideas get your creative minds going! Please share pictures of different things you have done to your embossed images, looking forward to seeing what you have done! Have a splendid crafty time!
What I did here was emboss some red card stock that I had cut down to size and then ran it through my Cuttlebug using the 4x6 embossing folder "Rebecca". Then I used a pen to traced the raised edges to make the embossed image pop. Here it shows the before and after.


This is the final product when I traced all the raised edges.
   
I  heard that you could use different materials in your embossing machines to give your pages a whole new look. I have used paper before and here all I did was take a piece of plastic packaging material and cut it to size, placed it in the embossing folder "Feather Group" by Anna Griffin and ran it through my Cuttlebug. I was so excited when I did this I called my hubby into my room and showed him how amazing it was! Afterwards I glued it to a piece of white card stock and put it on my page. Cant wait to try new materials!

Here is the plastic packaging i used to do the embossed image above. It's the packaging from Walmart's We Are Memory Keepers Journal Cards.

Tuesday, March 3, 2015

Thrifty Storage For Scrapbook Supplies

Hello fellow Scrappers! Today I am going to show you some thrifty finds that I got at thrift stores or garage sales in my area. We all know our hobby can get expensive and that we want to save as much money as we can so we are able to get more supplies, so why not look for cheap thrifty ways to store all of our supplies so we can spend what we saved on more supplies!?  Salvation Army is one of my favorite places to go when looking for deals on storage or even supplies. Even my hubby likes to go just look at their movies and whatever else they have so it is a win win situation! Here are some storage items that I have found and how I use them. Hope these storage ideas inspire you. Please post pictures of your storage ideas! Have a splendid crafty time!
I use a K-cup drawer that I purchased at Salvation Army for my Washi tape and I love it! I used duct tape sheets with a zebra pattern that I got at Walmart to decorate it.


This wire rack I found at Salvation Army.
I purchased the white shelves at a local garage sale. The two sets of drawer units you see here are actually hardware drawer units that you can get in hardware departments pretty much anywhere but I obtained these at local garage sales. I used zebra patterned duct tape that I purchased at Walmart to cover the drawers while adding some personality to an otherwise bland unit. I used my "Brother P-touch" label maker to label the drawers so I know what is in each drawer.
I got this wire wine rack at Salvation Army and I have large Mason jars on it which I will eventually fill with goodies! Some ladies I have seen use this idea to store their markers, pens and pencils.
I have this rack and a smaller one that I purchased at Salvation Army as well and I use them to display my paper packs. I love displaying my supplies not only does it add color to my room but it shows me what I have, which can be good or bad however you look at it!

This wire rack I purchased at Salvation Army and all I did was zip tie it to the bottom of my table to add extra storage if needed. I use it to hold my heat gun currently.
I use this spinning shelf for my Cricut Cartridges currently. The shelves are adjustable and there is another side to where I could add more if needed. I purchased this at a garage sale for $5!
I use acrylic picture frames to store my wood mounted stamps. I purchased several of these at Salvation Army for .20 a piece. I love how I can easily see which stamps I own while keeping it nice and tidy. You can also get these on Amazon. These are 8x10.

My New Scrapbook Haven


  Hello fellow scrappers! I am about to share with you my craft room! Do you love your space you get to create in? If not what would you change? I love mine! The only complaint I have is I wish it was bigger but don't we all! But it is better than some are able to have so I am thankful for what I have. We moved into this house in August 2014. My old craft room at our old house was some kitchen cabinets that I purchased at a garage sale for $50! I just painted them and added some panels of chicken wire to the doors and it looked amazing! When we moved we tried taking them with us to put in my new room but unfortunately the new room that I was turning into my craft space was too small for them. So I gave them to a friend to use. I started fresh! I always loved the look of the Recollection cubes but they are quite expensive if they are not on sale. Hubby and I went to Walmart and got a few of the small three bookshelves you can get for about $15 each for me to start out with. Slowly I started adding Recollection cubes from Micheal's. I was so nervous adding shelving on the wall due to if we ever have children I will have to move everything into our master bedroom and I didn't want a whole bunch of holes on the walls everywhere. But I finally went and bought some track shelving at Home Depot and put that up on both sides of the window using those anchor screws since the studs in the walls are not always in the spots I need them. On the track shelving I try to not put anything heavy on them just in case they decided to not hold (I'm always paranoid). Once I got the track shelving up I was like "hey lets try this on the wall to get it off the floor!" "ohhh that will look good there!!" and well now I have three of the walls pretty much filled with shelving without looking cluttered. It makes the room look so much different and so much better with shelving on the walls. My hubby does not know much about wood working or home improvements so hanging the track shelving was something he had never done and I could tell he was quite proud of it since he kept coming into my room to just stare at it.

What color walls do you have? What made you decide on the color? Mine are purple and grey. My Father in Law lived in our old house before we moved in and he was always quirky when it came to paint colors so somehow he decided painting the dining room plum purple would be great! So when we moved in it was purple and I actually liked it! That is where I got my inspiration for my color choice for the cabinets and my new room in our new house. So thanks Larry!

One thing in my craft room that everyone asks about is my ribbon holder that my dad and hubby built together. It went well in my old area! We even had it mounted up on the cabinets so it did not take up counter top space and I could just lift it off to place on the counter. Eventually I would love to mount it again in my new space. I will post details on my ribbon holder another time. I just drew up a picture of how I wanted it and my dad and hubby brought it to life! A lot of ladies said my dad and hubby need to start up a ribbon holder business. My dad is an awesome handyman when it comes to pretty much anything. My hubby is taking lessons from him and learning a lot! They get a long great which is great but scary at the same time! Love my family and I love that they support my hobby.

Eventually I am going to try and upload a video of a tour of my room and where I keep all my supplies but for now here are pictures because everyone loves pictures! Also I will have another page that will show what my old area looked like. I love seeing pictures other crafter's spaces!

Sorry about the long post, I hope you enjoyed it and I look forward to hearing your responses! Have a splendid crafty time!

My Old Scrapbook Area


AFTER
AFTER
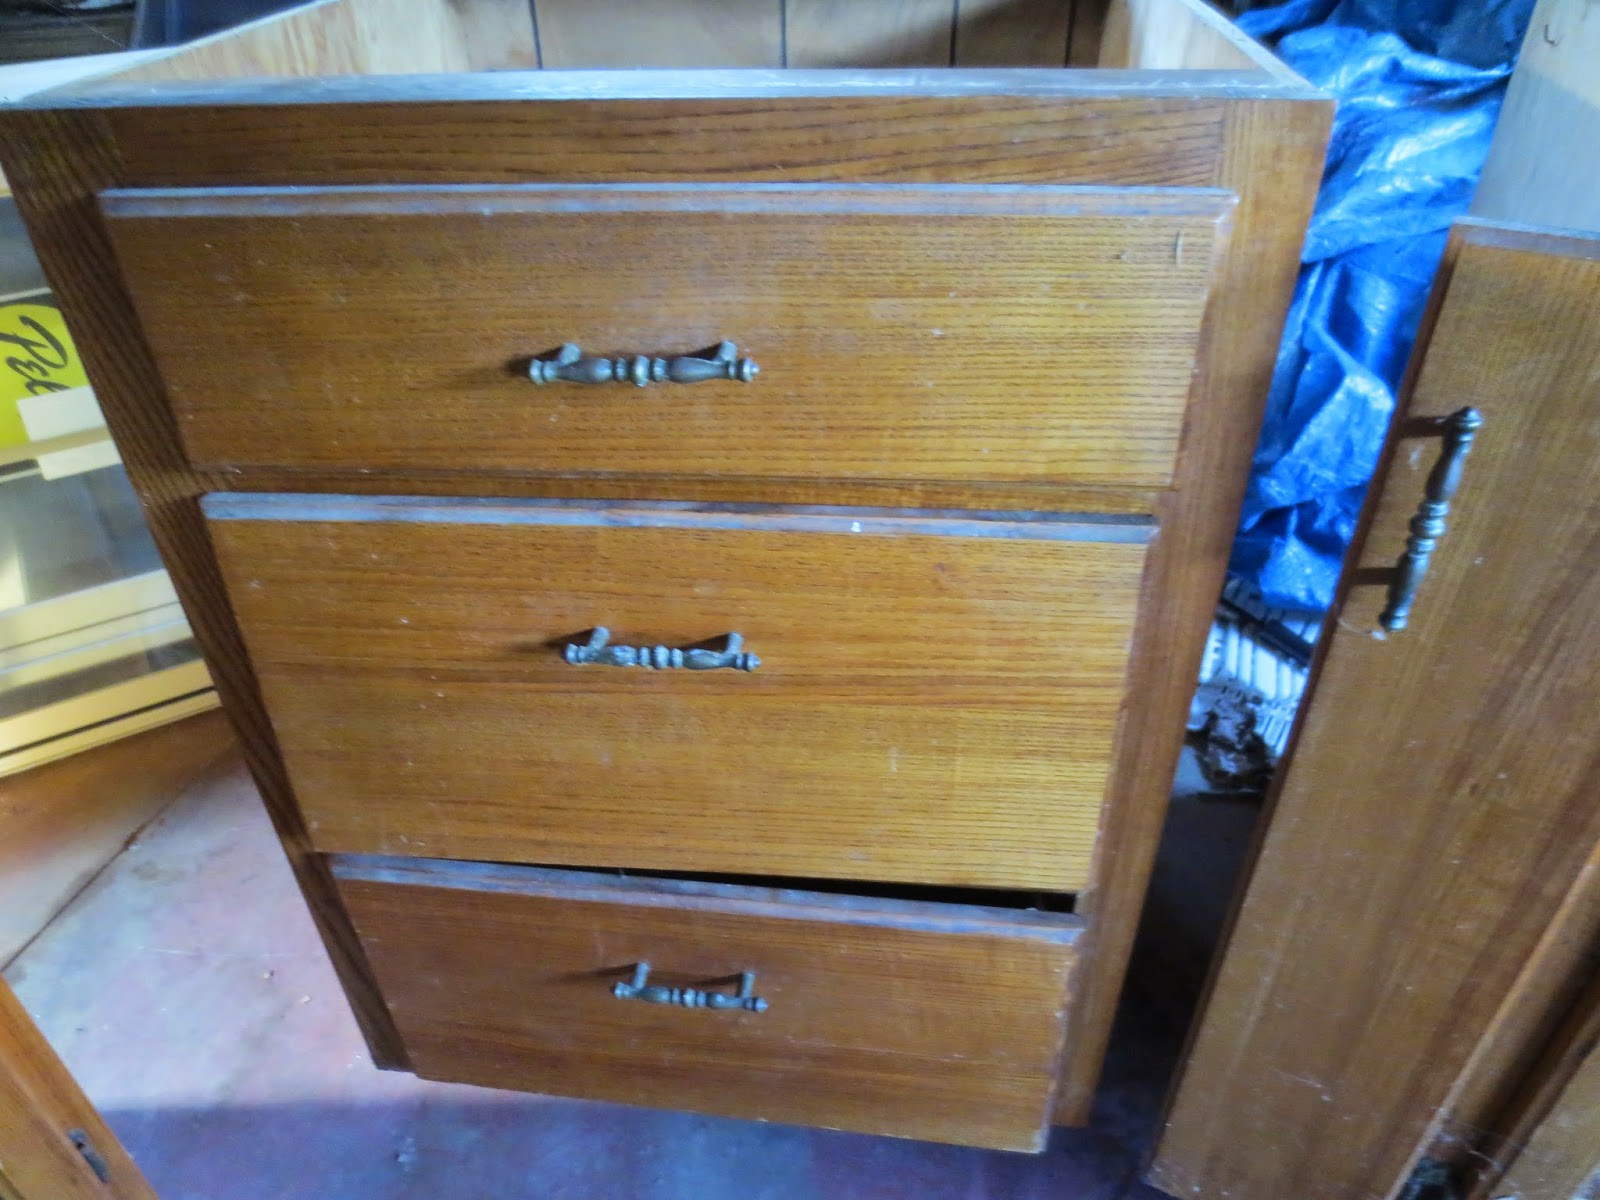
Hello fellow Scrappers! I'd like to share with you on how my addiction started. I love going to garage sales and finding good deals! I bought a set of old cabinets for a whopping $50. They sat in our garage for at least a year and I was about to throw them away but then I started thinking of making my own scrapbook area since I was sharing a desk with the hubby. So I put on my thinking cap and transformed these cabinets from looking worn and tattered to looking fabulous!

Now for those that are going to use cabinets or shelving and are wanting to paint it, make sure you sand the cabinets or shelving before you paint. We learned the hard way and didn't think that we really needed to sand them. After we painted them the oils from the stain started seeping through the paint and causing the paint to bubble. If you sand them that should not happen. It took multiple coats but it finally took. The door panels were broken which was fine because I wanted to be able to see my supplies in the cabinets. I took some chicken wire I bought at Home Depot and cut it to size with wire cutters (which I am sure there was a better way) then placed it onto the doors where the panels use to be. I then spray painted all the hardware with silver to give it a more clean sparkly look! The outside of the cabinets and drawers I painted white and inside of the drawers and cabinets I painted them a light purple to go with my Father in Laws choice of wall color for the entire dining room. After all the cabinets were painted we moved them into the house and installed them with the help of my brother and his girlfriend. Then my brother and hubby went to Home Depot to get the pre-cut counter top, I believe the length of the counter was 8 ft. It's cheaper to get the pre-cut counter than to have it customized. After all that I finally had my own space to call mine! It was the best looking space in the whole house and I'm not kidding!

So anytime you are wanting to have your own space but not wanting to break the bank look at garage sales, thrift stores even go in the scratch and ding sections at the big box stores to get cheaper cabinets and shelving. They may not look the greatest but that is why you make it your own and it feels great to know you did the work yourself!

If you would like to share your before and afters of your furniture creations that would be awesome! Nothing like taking something that looks terrible and totally flipping it and making it gorgeous! Have a splendid crafty time Scrappers!

BEFORE
BEFORE
BEFORE
Spray Painted the Hardware
Looking Pretty!
What happens when you don't sand before painting
Inside drawers
Chicken wire used for the door panels